


This article will explain how to change a residential reverse osmosis filter or membrane. The procedure might differ depending on the kind of system, but the logic stays the same. Many RO water system suppliers have tried everything to make it as simple as possible for users to change or install new filters and membranes into a system. We previously talked about flashing a membrane, and the process is also recommended after installing or replacing a new membrane or filters.
Step 1.Turn off your water supply and, if necessary, disconnect your water filtration equipment.
Step 2. Turn off the cold water supply valve to your water treatment system.
Step 3. Turn off the water supply line by turning on the faucet and letting the water drain until it runs clear or there are no more air bubbles in the bar, which might take up to five minutes.
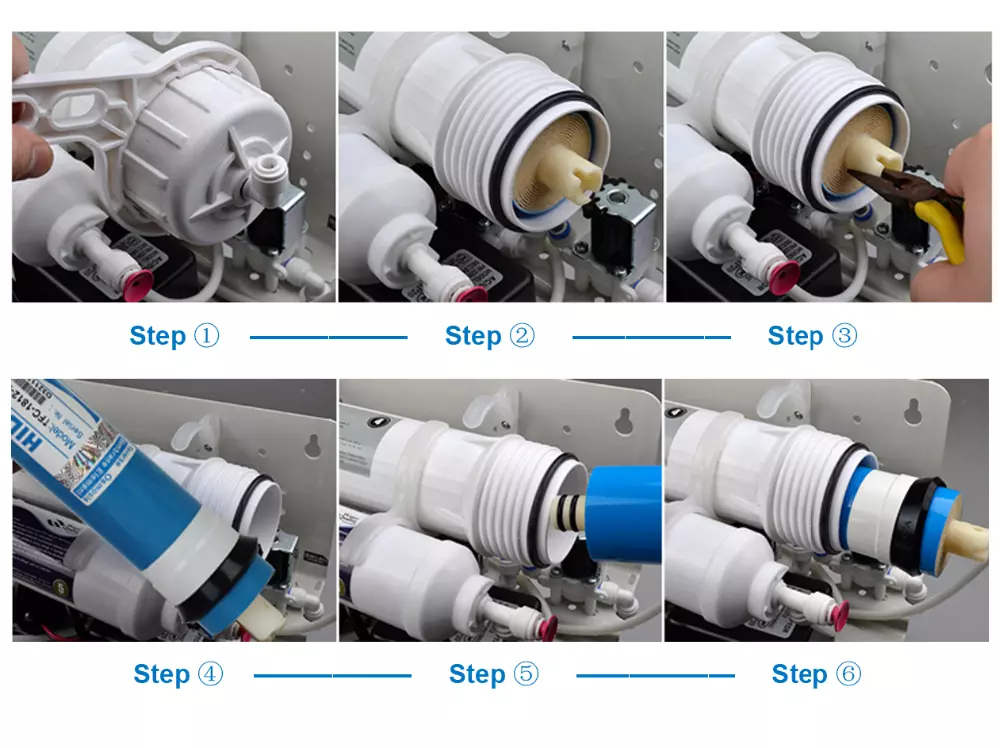
Step 4. Unscrew the bolts on the filter housing to disconnect it from the water softener.
Step 5. Replace the old filter cartridges with new ones by pressing them firmly into position until they click, indicating that they are locked in.
To avoid getting germs on the components of your RO system that come into contact with water, wash your hands with soap and clean water after handling any of your carbon filters or tubing.
Step 6. Please turn on your reverse osmosis system water supply and drain out any trapped air in the system by running it for a few minutes.
Step 7. Turn on your cold water valve and the RO system to ensure that everything is working correctly.
Step 8. Run a couple of pitchers of filtered water through your water purification system to flush out any leftover impurities.
Step 9. Test the pure water coming from your tap to ensure that it tastes and smells clean.
I hope you know the right way to change your reverse osmosis filters. If your water still has an unpleasant taste, you may need to repeat these steps or call a plumber for assistance.
Post time: Aug-22-2022